Up to this point, the 3d printer’s structure has followed the design laid out by Patrick Hood-Daniel. All of the mechanical components and structural aspects have been followed faithfully with the only exception that the print bed was doubled in size. Now I plan to take the final build of this printer in another direction, deviating from the final product that has been called the WhiteAnt. The first new element that I'm adding is a heated build platform. Just like the PCB heat bed on a Prusa Mendel, it will provide the necessary bed heat and easily be leveled out to the extruder’s hot end. Since a PCB version of the heat bed is not available in a 12 x 17" size, the best option is to build one using an aluminum sheet and power resistors.
There are a lot of options when considering what size and number of resistors to use when designing a circuit. I factored cost, ease of wiring and number of units I wanted to spread across the bed with one primary goal in mind: I wanted the perimeter of the bed to be the primary focus of heat. Since my main objective with this printer is to print full bed size prints, my experience to date has shown that I’ll have warping issues at the corners of my largest prints. I'm hoping that concentrating more heat on these trouble points will help reduce warping.
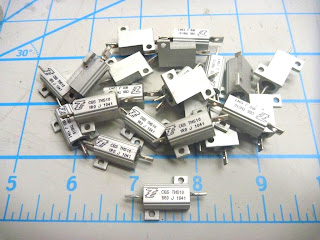
I settled on using (20) 1 ohm resistors rated at 10 watts (I purchased them from www.newark.com). I decided to stay in the range of about 120 watts of heat dissipation and determined the values by using Ohm’s Law. By wiring the resistors in 2 banks (each bank has ten 1 ohm resistors in series for a total of 10 ohms resistance) and then wiring the 10 ohm banks in parallel, a total of 5 ohms total resistance and a total wattage rating of 200 is achieved. My system voltage will be 24v, so once again using Ohm's Law, w= v^2/r= 24v^2/5r= 115.2 watts.
If I was using a 12v power system like the Prusa Mendel, I would simply make 4 banks (each bank has five 1 ohm resistors in series for a total of 5 ohms resistance) and then wire the 5 ohm banks in parallel for a total of 1.25 ohms total resistance. Using the same formula above would give me a total of 115.2 watts.
For more information concerning designing a system: start with the RepRap wiki concerning heated bed theory here. (CAUTION! Care must be exercised when creating your own configurations. If uneven load distributions are created: extreme heat may occur and this will possibly burn out components or catch on fire.)
 |
| 4 banks of 1 ohm resistors in series. |
I was able to spread 18 of the resistors around the perimeter of the aluminum bed. I placed 2 in the center so that I could place a thermistor and obtain a decent temperature reading for control. On the front edge of the bed I mounted a red LED in series with 2k ohms as an indication of power ( if a 12v system is used, then the resistor in series should be lowered to 1k ohm).
 |
| Adding heat transfer compound. |

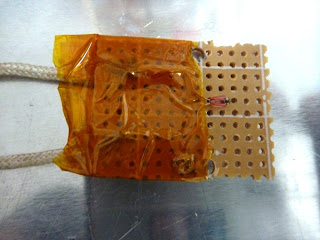 |
| 100k Epcos thermistor |
 |
| Complete wiring and bolts loaded with tension springs. |

After mounting the bed on the printer I ran a temperature test using an infrared thermometer. I allowed the bed to warm up for 15 min.
 |
| Center of bed reads 63 c. |
 |
| Midway on diagonal reads 58 c. |
 |
| Corner reads the hottest @ 74 c. |